Assessing Your Brick Paver Condition
Why Regular Maintenance Matters for Paver Longevity
Your brick paver driveway might look respectable from the kitchen window, but up close you could spot cracks, shifted joints, or a paver that rocks underfoot. That is your surface begging for intervention! In South Africa, harsh UV and sudden thunderstorms accelerate wear, so I recommend yearly inspections to prevent costly surprises. Look for these warning signs:
- Loose or rocking pavers that catch heels.
- Cracks or chipped corners that invite water intrusion.
- White efflorescence stains that signal moisture problems.
- Weeds or ant nests undermining the base.
Why bother? A stable base determines how long your patio lasts. Skipping maintenance lets water erode the bedding sand, turning a small dip into a sinkhole. Knowing how to maintain and clean brick pavers for longevity means catching these issues early, when the fix is a quick reset rather than a full relay. That is the difference between a weekend chore and a contractor’s invoice.
Identifying Common Signs of Wear and Damage
Assessing your brick paver condition demands more than a casual glance from the patio door. Walk the surface slowly, preferably after a rainstorm when the bedding sand is damp and weaknesses reveal themselves. Press down on suspicious areas with your heel. A paver that shifts under pressure has lost its bedding support, and that movement will only accelerate.
The assessment should follow a deliberate sequence:
1. Check the perimeter edges where sand washout begins.
2. Examine the drainage flow across the entire surface.
3. Test joint sand depth with a flat screwdriver.
4. Note any areas where water pools long after the storm passes.
Each finding tells you something about the base beneath. Knowing how to maintain and clean brick pavers for longevity starts with this honest evaluation. A surface that looks acceptable from a distance often hides subtle movement patterns. The assessment is your early warning system, and it costs nothing but time.
Understanding Paver Base and Joint Sand Health
Your pavers are only as stable as the sand packed between them. Ignore joint sand and you’ll soon be shifting pavers back with your foot. Probe a few joints with a flat screwdriver. If sand sits at least 20 millimetres deep, you’re fine. Shallow sand means shifting underfoot. The base below should be compacted crushed stone. If you find soil instead, rain turns it into mud, and pavers become a wobbly mess. Check edges near downspouts first. That’s where water washes sand away most. A post-storm inspection helps. Press down on suspect pavers. Any vertical movement points to a failed base. Understanding this relationship is central to How to maintain and clean brick pavers for longevity. Here’s what to look for:
- Joint sand depth: 20mm or more
- Base compacted, no soft spots
- No gravel or soil mix
Clean sand and solid base work together.
Seasonal Factors That Affect Brick Pavers
No paver fails in the season you expect. South African weather moves between extremes, and each transition changes the landscape beneath your feet. After every storm period, I walk the paved areas and note what feels different underfoot. The Highveld’s summer hailstorms can dislodge paver corners, while coastal winters drag salt residue into the gaps. Regular assessment is part of How to maintain and clean brick pavers for longevity, because paver condition shifts month to month, not year to year.
A seasonal inspection should include:
- Efflorescence, the pale chalky film that surfaces after wet winters
- Moss or algae in shaded joints following the summer downpours
- Hairline cracks that widen from the temperature swing between hot days and cold nights
Do not assume a paver that looked sound in April will survive September! Wet to dry transitions expand and contract the underlying soil. A deliberate walk after each equinox reveals what the season has done.
Choosing the Right Cleaning Solutions and Equipment
Eco-Friendly vs. Chemical Cleaners for Brick Pavers
Choosing the right cleaning solution matters as much as the elbow grease you put in. Many standard detergents leave a filmy residue that actually attracts dirt faster. When you look at eco-friendly vs. chemical cleaners for brick pavers, the choice often comes down to your specific stain problem and the local water conditions. Efflorescence, those white chalky salts, usually just needs a mild solution, while stubborn oil stains may require a heavier degreaser.
The equipment is just as critical. A pressure washer is effective, but using too high a setting can erode the sand joints you worked to protect. Here is what generally works well for the water quality found in parts of South Africa:
– Use a fan nozzle and a maximum of 1500 PSI for general rinsing.
– Opt for a stiff nylon brush for scrubbing, not a wire brush.
– Apply chemical strippers only to the affected pavers, not the whole patio.
The debate between eco-friendly and chemical cleaners is one of trade-offs. If you want to know how to maintain and clean brick pavers for longevity, it pays to consider the runoff. Chemical solvents might lift a heavy stain quickly, but they can harm your shrubs and lawn. Phosphates and acids can linger in the soil near your pathways. Biodegradable options work a little slower sometimes, but they are gentler on the surrounding ecosystem and your plants. For routine maintenance, a simple pH-neutral soap and water mix will work fine. You do not need a cabinet full of harsh toxins for regular upkeep.
Pressure Washer Tips: PSI, Nozzle, and Technique
Choosing the right cleaning solution is less about brand loyalty and more about the stain. A pH-neutral soap handles daily grime. Citrus degreasers cut oil without wrecking your lawn.
Pressure washing needs patience. Exceeding 1500 PSI strips the joint sand clean away. Use a fan nozzle and keep the wand moving. Here is what works!
- Set PSI between 1200 and 1500.
- Hold the nozzle at 45 degrees.
- Work from the edge inward.
That approach preserves joint sand and prevents etching. How to maintain and clean brick pavers for longevity depends on restraint. The right equipment matters, but smart usage matters more.
Best Brushes and Scrubbers for Stubborn Stains
Choosing the right cleaning solution starts with identifying the stain. Efflorescence requires a diluted acid wash. Oil needs citrus degreaser. For general grime, pH-neutral soap works. The equipment matters as much as the chemistry. Stiff bristle brushes with nylon or polypropylene fibers handle textured surfaces without scratching. A grout brush reaches tight joints. For deep-set stains, a scrubber with a long handle reduces strain on your knees.
- Brass brushes for stubborn mineral deposits
- Push brooms with stiff synthetic bristles for large areas
The right scrubber applies even pressure across the paver face. That consistency is part of how to maintain and clean brick pavers for longevity. Avoid wire brushes that leave metal fragments. They rust and discolor the surface. A quality deck scrubber handles tough spots without damaging the paver.
DIY Cleaning Agents: Vinegar, Baking Soda, and More
I have seen homeowners reach for bleach first, and that is almost always a mistake. It kills weeds in the joints but leaves a pale wash on the brick. For most stains, a paste of baking soda and water does the job without the collateral damage. The paste sits for ten minutes before scrubbing with a stiff brush. Vinegar, diluted at one part to three parts water, dissolves efflorescence and hard water marks. Test it on a spare paver first. Acidic solutions can dull the brick if left too long.
Castile soap mixed into warm water lifts oil and everyday grime without stripping the paver’s protective layer. Rinse thoroughly so no soapy film remains to trap fresh dust. These simple kitchen staples often outperform commercial degreasers. Matching the agent to the stain is the core of how to maintain and clean brick pavers for longevity.
- Baking soda: organic stains and mildew
- Vinegar: mineral deposits and efflorescence
- Castile soap: oil spots and general grime
When to Use Specialty Cleaners for Oil or Efflorescence
Selecting the correct cleaning solution starts with diagnosing the stain rather than reaching for the strongest product. Efflorescence, that white chalky deposit, often responds to dedicated masonry cleaners designed to dissolve mineral salts without attacking the clay surface. Oil stains from vehicles or braai drips need a degreaser with emulsifying properties, not a general patio cleaner.
Equipment matters just as much as chemistry:
- A stiff bristle brush works for textured surfaces.
- A pump sprayer distributes liquid treatments evenly.
- Rotating scrubbers attach to a drill to save your knees.
Understanding how to maintain and clean brick pavers for longevity means matching the cleaner to the contaminant. Some industrial options weaken the joint sand or leave a film that attracts dust, so check the label for compatibility with brick and joint sand before application.
A Step-by-Step Guide to Cleaning Brick Pavers
Prepping the Paver Area: Clearing Debris and Furniture
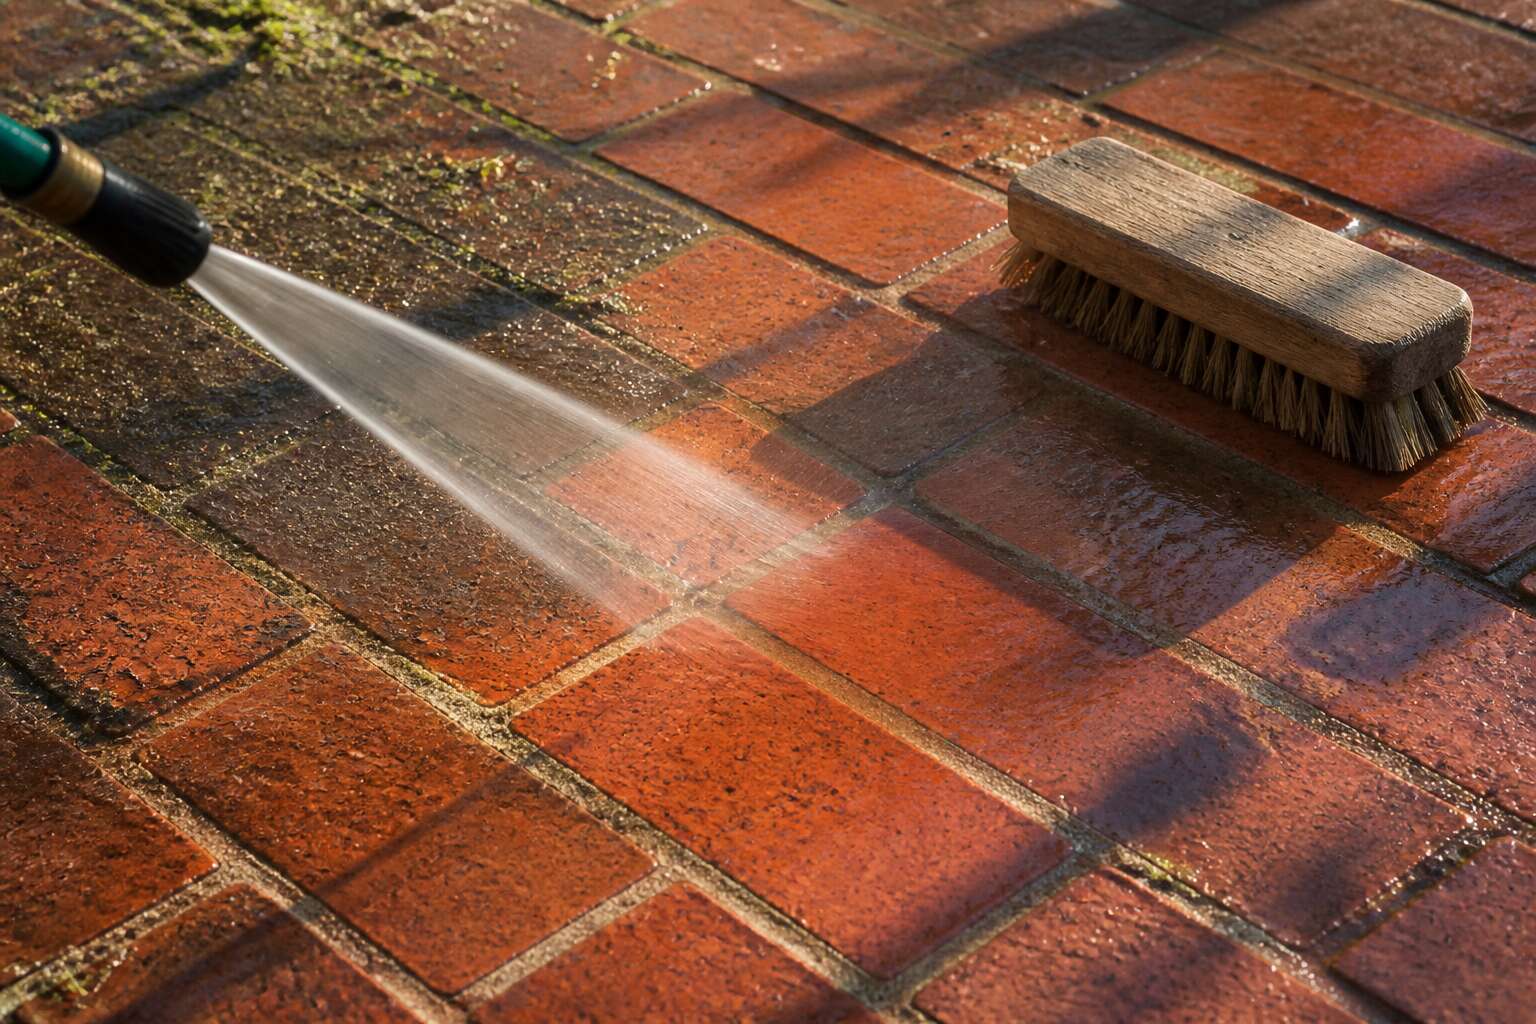
Every paver installation begins to show its age when dirt accumulates in the joints and on the surface. The first step in any meaningful restoration effort involves preparing the canvas. You cannot effectively treat a surface that is covered with leaf litter, loose soil, or the remnants of yesterday’s braai. I always start by removing the obvious offenders, the furniture, the potted plants, and the portable fire pit. This is not merely about access; it is about preventing the abrasive action of grit from scratching the surface during the subsequent wash.
Once the area is clear, I switch to a stiff broom or a leaf blower to dislodge the loose particulate matter. This dry sweep is crucial because it reduces the amount of mud you will create later.
– Sweep the entire surface diagonally to reach deep into the crevices.
– Pay special attention to corners and edges where debris collects.
– Use a scraper to lift any stubborn, caked-on residue.
After this initial sweep, inspect the drainage paths. Ensure that the water has a clear route to escape during the wet cleaning phase. This preparation is the quiet, unglamorous work that dictates the success of the entire procedure. It makes the subsequent steps far more effective and protects the integrity of the pavers for years to come. The goal here is to expose the brick fully so the cleaning agents can work directly on the stains, rather than on the dirt sitting atop them. This is the fundamental foundation of how to maintain and clean brick pavers for longevity.
Removing Weeds and Moss from Joints and Edges
Weeds and moss have a mission: to dismantle your paver surface from the inside out. Their roots force apart the joint sand, creating voids that undermine stability. I always tackle this on a completely dry day, because wet weeds turn into a slimy mess and make extraction harder.
The right tool is non negotiable. A dandelion weeder or an old screwdriver works for narrow joints. Insert the blade deep alongside the root, then give a firm levering motion.
- Pull the weed straight up to snap the taproot.
- Scrape the joint walls with a wire brush to knock off moss.
- Suck up the residue with a shop vac.
Once the joints are empty, check the sand level. Topping up with fresh joint sand seals the gaps. This routine is the practical answer to how to maintain and clean brick pavers for longevity.
Applying the Right Cleaning Solution Safely
Applying cleaning solution safely requires a methodical approach. I always start with an inconspicuous corner, a spot hidden from the main sightline, to test how the paver reacts. This small act prevents costly etching. Mix the product exactly as the label dictates. No guessing, because concentrated solutions work against you!
Apply from the bottom edge upward, which stops streaks from running down clean surfaces. Use a pump sprayer for even coverage. Allow the dwell time, usually ten minutes, but shorten it under harsh South African sun. Then agitate with a stiff brush.
- Wet the paver surface lightly first
- Spray the solution in straight, overlapping passes
- Scrub before rinsing
Working in manageable sections keeps the solution from drying mid-task. A dry chemical film is harder to rinse and leaves residue. Proper technique, tied directly to how to maintain and clean brick pavers for longevity, depends on this careful application.
Scrubbing and Agitating Dirt and Grime
Pressure washing can give a tantalising illusion of effort, but the true work of extraction happens with manual persuasion. A rotating or stiff push broom, wielded with deliberate force, dislodges the entrenched grime that water alone merely redistributes. I find the most effective motion is a circular grind, pressing the bristles deep into the textured surface rather than just sweeping across the top.
This agitation step is where the fate of your investment is decided. The physical act forces the cleaning agent into the micro-pores of the clay, breaking the bond between the dirt and the paver. It is a tactile process, and you can feel the surface change under the bristles as the film lifts. Give each paver a thorough, systematic pass in small sections.
– Nylon brushes for general cleaning
– Polypropylene brushes for oil and grease stains
– A scraper for hardened debris
The effort you invest in this phase directly influences the outcome. Surface-level rinsing will leave a ghost of the stain, a shadow that reappears as the pavers dry. When the water runs clear and the brush meets only the clean, gritty texture of the brick, you have achieved the necessary condition for longevity. This is the labour that underpins how to maintain and clean brick pavers for longevity.
Rinsing Thoroughly to Avoid Residue Buildup
Rinsing is the step everyone rushes, and it shows. Miss your moment here and the cleaning agent dries into a sticky film. That film catches dust, pollen, and whatever the wind brings. I use a fan nozzle at low pressure, because high pressure just shoves detergent deeper into the pores. Start at the highest corner and work downhill. Let water do the hauling.
- Overlap each pass by a hand width
- Tilt the wand to push water off the paver face
- Run a finger across the surface to test for squeakiness
A clean paver squeaks. A residue-coated one feels slippery. This rinse is the unglamorous core of how to maintain and clean brick pavers for longevity. In South Africa, where the sun bakes everything fast, you have about ten minutes before residue cements itself. I do two rinses, not because I am fussy, but because one never quite convinces me.
Drying Time and What to Do Before Sealing
Drying time is the quiet chapter of paver care that most people skip, to their regret. In the South African sun, a washed paver can look bone dry in an hour. That is a lie. The surface dries, but the pores underneath still hold moisture like a sponge holds water. Sealing over that hidden dampness is how you trap efflorescence and cause the sealer to blush white. I tell clients to wait a full 24 hours minimum after rinsing, and in humid coastal towns like Durban, I push that to 48 hours.
The test is tactile and simple. Press the back of your hand against the paver face. If it feels cool or clammy, you are not ready. A warm, dry surface signals the paver has expelled its trapped water.
Before you break out the sealant, do a final sweep for the small things that ruin a perfect job:
– Check the joints for sand that was washed away during rinsing; repack them if needed
– Inspect for any oily spots that reappeared after drying; these need a specialty cleaner
– Confirm the surface is free of dust, which a simple broom can handle
Rushing the dry phase is how to maintain and clean brick pavers for longevity in theory, but fail in practice. Patience here is the difference between a seal that lasts two years and one that fails in eight months.
Sealing and Protecting Brick Pavers for the Long Haul
Benefits of Sealing Brick Pavers
South African summers are unforgiving. Brick pavers absorb intense UV radiation, heavy thunderstorms, and constant foot traffic. Sealing changes how those forces interact with the surface.
A penetrating sealer fills the microscopic pores in each clay paver, reducing water ingress by up to 90%. This single action prevents the freeze-thaw cracking seen in Gauteng winters and the moss growth common in coastal gardens. Joint sand stays locked in place, preventing ants from burrowing down or rain from washing it away. I have seen pavers survive a decade of Western Cape weather simply because they were sealed within a month of installation.
Learning how to maintain and clean brick pavers for longevity means recognising sealing as the final step in a proper care cycle. The measurable benefits include:
- Reduced water absorption, which stops efflorescence before it starts
- Stain resistance against oil, wine, and bird droppings
- Colour enhancement that resists UV fading
- Easier cleaning during the next maintenance session
Sealing every two to three years keeps the surface dense, the joints stable, and the colour true.
Choosing Between Film-Forming and Penetrating Sealers
Most homeowners focus on the cleaning step, but the choice of sealer determines how often you repeat that labour. A film-forming sealer sits on the surface like a clear plastic coating. It offers a glossy, wet look and strong protection against oil and grease. The catch? It wears unevenly under foot traffic and can peel or blush in coastal humidity. Once that happens, you are stripping the entire layer before reapplying.
Penetrating sealers work differently. They soak into the clay body and react chemically to block moisture from within. The surface texture stays natural, and there is nothing to peel or scratch off. For South African conditions, especially the high UV in the Karoo or the salt air in Durban, a penetrating option tends to outperform. It also simplifies how to maintain and clean brick pavers for longevity because the sealer does not alter the surface profile.
The trade-off is straightforward:
– Film-forming sealers give higher gloss and stain blocking, but require more frequent maintenance and complete removal when they fail.
– Penetrating sealers last longer between applications, preserve the original slip resistance, and are far more forgiving when you need to reapply.
Reapplication timing depends on the product and the exposure. A busy driveway in Johannesburg needs a fresh coat every two years. A quiet patio in Cape Town can stretch to four. The best way to test? Splash water on the pavers. If it beads up, the protection is still active. If it soaks in quickly, the surface is asking for another coat. That simple check prevents over-sealing, which wastes product and can leave a tacky residue that attracts dust. Getting this part of the routine right means the next deep clean is quick, and the pavers keep their colour and structural integrity for decades.
How to Apply Sealer Evenly Without Streaks
Applying sealer evenly is where the craftsmanship comes in. A rushed coat creates lap marks that haunt you for years. The secret lies in maintaining a consistent wet edge and never letting the sealer dry mid-stroke.
Brick pavers are thirsty surfaces. They pull moisture from the sealer rapidly, especially under the South African sun. Work in small sections and use a roller with a medium nap. Roll in one direction, then immediately cross-roll to work the sealer into the pores. Backrolling prevents pooling and eliminates the telltale shadows of uneven coverage.
Weather conditions dictate your window. Apply sealer when the paver temperature is between 10°C and 25°C, ideally in the morning before the heat builds. Humidity over 70% slows curing and invites a cloudy film. These variables affect how to maintain and clean brick pavers for longevity, because a flawed seal traps dirt instead of repelling it.
A small sprayer can help reach tight corners, but always follow with a roller for even distribution. Work in manageable blocks of about ten square metres. Rushing a larger area leads to dry spots that absorb the next coat unevenly, creating a patchwork effect that is impossible to correct without stripping everything down. A uniform coat means the surface sheds water and grime predictably, which keeps the maintenance routine simple and preserves the pavers for decades.
Reapplying Joint Sand and Stabilizing Sand After Cleaning
Cleaning, especially with a pressure washer, will purge sand from between the pavers. Those gaps invite weeds and shifting stones. Reapplying joint sand after cleaning is the quiet ritual that supports the sealer’s long haul performance.
Use dried silica sand or a polymeric sand that hardens when activated with water. Sweep it across the surface in multiple directions, forcing it deep into the joints. Compact the pavers to settle the sand, then top up low spots. The sealer you applied earlier now bonds with this fresh sand, anchoring the paver edges.
Here is the sequence I follow:
- Sweep sand over the dry, clean surface.
- Compact or vibrate to work sand into gaps.
- Repeat, then apply sealer to lock the sand down.
How to maintain and clean brick pavers for longevity rests on this unglamorous chore. Skip it, and even the best sealer becomes cosmetic!
Preventative Maintenance Tips to Extend Paver Life
Creating a Routine Inspection and Cleaning Schedule
There is a quiet confidence in a brick paver driveway that greets you the same way every morning, steadfast and unbothered. That reliability is earned, not accidental. The secret to How to maintain and clean brick pavers for longevity is found in the cyclical discipline of a routine, a commitment to noticing the small shifts before they become structural stories of neglect.
Think of it as a slow walk around your property, a Sunday ritual with a purpose. During this inspection, your eyes should trace the mortar lines and the flat faces of each brick. You are looking for the subtle heave of a paver after a wet season, or the faint discoloration that hints at organic growth taking hold. Catching these moments early is far kinder to your wallet and your weekends than a full restoration later.
For the cleaning schedule, a simple monthly rhythm works wonders. A stiff broom and a garden hose can handle the general detritus. However, a deeper quarterly session is where you truly protect your investment. This is the time to address the stubborn stains and the moss that finds a home in the shaded joints.
- Check the joint sand levels after heavy rain or wind events.
- Look for any chipped or cracked pavers that could become trip hazards.
- Remove any standing water to prevent it from seeping into the base.
This preventative cadence is the true meaning of How to maintain and clean brick pavers for longevity. It is not about harsh chemicals or heavy machinery every week. It is about the gentle, consistent attention that keeps the surface intact. By adhering to this schedule, you ensure the paver base remains compacted and the surface remains beautiful, preventing the need for more aggressive interventions down the line. The goal is to make the upkeep feel less like a chore and more like a conversation with your home.
Managing Drainage and Preventing Water Damage
Water only needs a path. In South Africa, summer downpours meet hard afternoon sun. The most insidious enemy of brick pavers is beneath it. Managing drainage is your primary task. I have watched pavers heave after one wet season, all because runoff had nowhere to go.
Start by inspecting the slope! Water must travel away from structures, not pool in hollows. If standing water remains hours after rain, the base has already begun its surrender. French drains or channel drains redirect the flow, but clear blocked weep holes or edge restraints first.
- Check soil slopes outward.
- Clean gutters spilling onto paved areas.
- Fill low spots with compacted sand.
Preventing water damage is not about sealing every pore. It gives water somewhere to go before it weakens subgrade. How to maintain and clean brick pavers for longevity means remembering a dry base is stable. Intervene early with sand, grading, and vigilance.
Protecting Pavers from Heavy Loads and Scratches
Heavy loads cause cracks, and cracked pavers allow water into the base. I have watched delivery vehicles crush paver edges that were never built to carry them. Protection starts with distribution!
Use plywood sheets or rubber mats for drop downs and parking. Spread the contact area. Guard edges and corners first.
These are the rules I apply:
- Never drag metal furniture, braais, or plant stands across the surface.
- Put rubber pads under anything static.
- Sweep away grit before it becomes the abrasive that grinds into the paver face.
Scratches collect moisture and grime. How to maintain and clean brick pavers for longevity means reducing wear before it happens. A soft broom costs less than replacement.
Addressing Minor Settling, Chips, and Cracks Early
Cracks are a call to action, not a cosmetic flaw. A hairline fracture in a concrete paver is an open channel for water to breach the compacted base below. Once moisture undermines that foundation, the inevitable result is uneven settling and a compromised surface. How to maintain and clean brick pavers for longevity involves catching these small failures before they expand into a full patio repair job. The moment you spot a chipped edge or a fine line across a paver face, mark it and prepare a repair.
Minor settling often appears as a slight depression that collects water after a storm. I address these dips by lifting the affected pavers and levelling the bedding sand beneath them. It is a straightforward process that prevents trip hazards and stops water from pooling against the paver edges. For chips and cracks, apply a polymeric sand slurry or a specialised paver patch compound to fill the void. These products bind well and match the existing colour if you select the right shade. Neglect is the only true enemy here, as small flaws are manageable, but widespread crumbling requires a full relay.
The early intervention protocol is simple and consistent. Walk the perimeter of the installation and inspect the transitions where the paver meets the driveway or lawn. Look for joint sand that has washed out, as empty joints allow pavers to shift laterally against one another. Replenish that sand immediately to lock the units together. A swift response to these stresses is the very definition of how to maintain and clean brick pavers for longevity, as it preserves the structural integrity of the entire system. The work is tedious but far cheaper than a base rebuild.
Winter Care: Ice Melt Products Safe for Brick Pavers
Winter in South Africa often arrives with little fanfare, yet its effects on hardscaping are undeniable. The real cost of neglect reveals itself not in the frost itself, but in the chemical reactions we introduce to combat it. Generic ice melt products, often sodium chloride based, are brutal on brick pavers. They accelerate the spalling of the surface and wreak havoc on the joint sand, leaving a gritty, unstable mess. The question of how to maintain and clean brick pavers for longevity is answered here with a simple rule: read the label.
Selecting a paver safe deicer is not about aesthetics, it is about structural preservation. Calcium magnesium acetate and potassium chloride formulations are significantly less corrosive. These products work by lowering the freezing point of water, but they do so without the aggressive salt brine that attacks the paver’s integral strength.
For those who prefer a more proactive approach, the management of moisture is paramount.
1. Ensure the paver installation has a slight slope away from structures to facilitate runoff.
2. Remove standing water promptly after a downpour to prevent it from seeping into the bedding layer.
3. Apply a breathable penetrating sealer before the cold season begins to reduce water absorption.
This is preventative maintenance, not a reactive repair. A thin layer of sand scattered over the surface before a freeze provides traction and minimizes the need for chemical applications. You must also be wary of the freeze thaw cycle itself. When water penetrates a crack and freezes, it expands by roughly nine percent. This physical force alone can pop a paver out of alignment. The correct ice melt, combined with a dedicated effort to keep the surface clear of organic debris, is the most efficient method to extend the life of your investment. It is a quiet, unglamorous task, but it is the very essence of how to maintain and clean brick pavers for longevity, ensuring the installation remains level and dignified for decades to come.

0 Comments