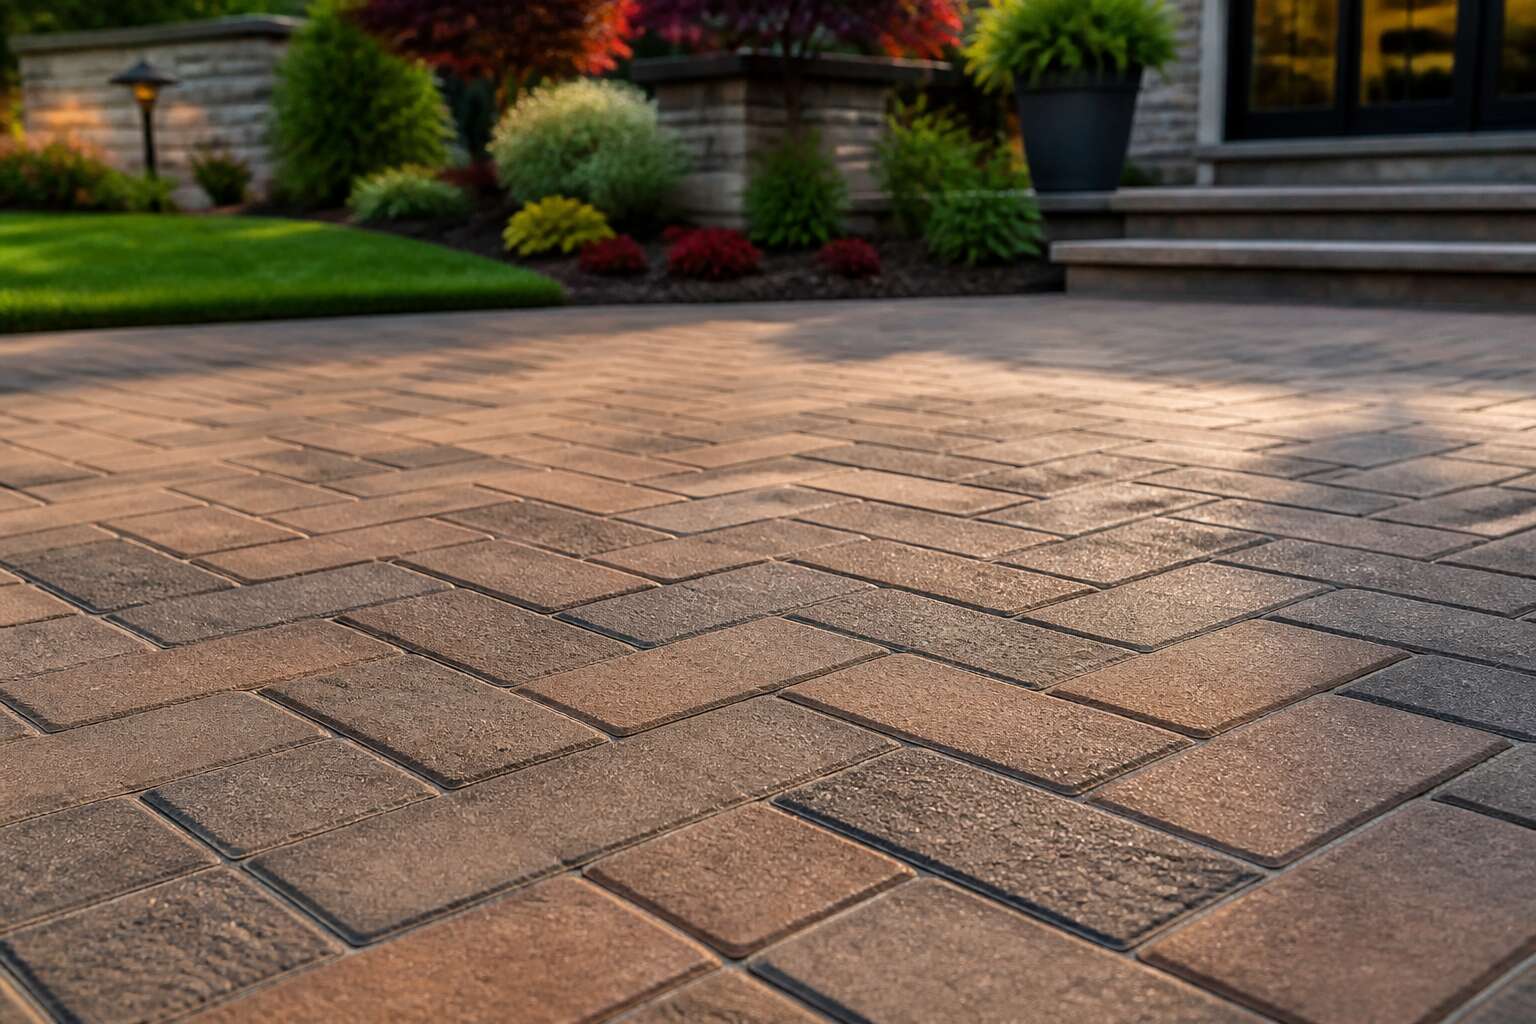
Assessing Your Project Site
Determining Soil Type and Drainage
Clay holds water. Sand lets it go. That single difference shapes every paving decision I make with clients. The soil beneath your project site determines how much preparation your SmartStone paving installation needs. South African grounds vary from the sticky black clay of the Free State to the loose sandy loam along the coast, and every type behaves differently when rain arrives.
Walk your property during a downpour and watch the water. It reveals everything you need to know! Puddles that linger for hours indicate poor drainage. Channels cut into the soil suggest fast surface runoff. The damp patches that stay wet for days point to a high water table.
A proper site assessment examines:
- How quickly water absorbs into the ground
- Whether the soil is granular or cohesive
- Where the natural slope carries runoff
Knowing your drainage profile prevents expensive corrections after the pavers are set.
Measuring the Installation Area
The difference between a flawless SmartStone paving installation and a costly redo often comes down to a tape measure and an afternoon of patience. I have watched seasoned contractors skip this stage, and the results never ended well.
Measuring your installation area goes beyond pacing out the length and width. South African driveways rarely form neat rectangles. Sketch the site and split it into triangles and rectangles, then calculate each section separately. For curves, run a string line along the boundary and measure at steady intervals.
Elevation changes deserve the same attention. A slope of a few centimetres alters how a SmartStone paving installation settles over time. Note every level change, each structure bordering the site, and every utility cover hiding beneath the grass.
Identifying Underground Utilities and Obstructions
A SmartStone paving installation hides its dangers underground. One misplaced scoop can sever a fibre cable or crack a stormwater drain. The ground remembers what the eye forgets.
Start with the municipal plans. Johannesburg and Cape Town both keep utility records. But private lines, the ones the previous owner buried without permission, stay off every map. Walk the site. Look for valve covers, manhole lids, and patches of grass that grow greener after droughts.
- Water meters and stopcocks
- Electrical junction boxes
- Old septic tanks or soakaways
Tree roots push through everything. A single acacia root can shift a whole section of SmartStone paving installation within two seasons. Probe soft soil with a steel rod. Listen for the hollow thump of a buried pipe. That thump means stop. It means calling the council before you order a single stone.
Choosing the Right SmartStone Product
A site assessment is not a casual walkabout. It demands a sharp eye for delivery access, storage space, and the subtle contours that will receive your new paving. A narrow driveway restricts machinery. A shaded yard full of garden furniture complicates material stacking. These practical constraints influence every decision.
Choosing the right SmartStone product for a SmartStone paving installation depends on traffic loads and local climate. A pool deck requires a slip-resistant finish. A shared driveway needs thicker units to bear vehicle weight. Also consider the visual pattern of the stone, its colour tones under the South African sun, and how it will age.
The staging area’s suitability matters before a SmartStone paving installation begins. Its key elements:
- Pallet weight and ground firmness at the staging spot.
- Path width for wheelbarrows and stone cutters.
- Overhead branch height and clearance for machinery.
Preparing the Ground for SmartStone
Clearing Vegetation and Debris
Old sites carry residue. Before SmartStone paving installation can begin, I clear every tangle of vegetation and every fragment of debris. Vine roots, pale and fibrous, cling to the topsoil. Left undisturbed, they decompose unevenly, causing the surface above to sink.
Remove these culprits:
- Grass mats and their rhizomes
- Buried stones and concrete chips
- Rotting timber and abandoned sheeting
Bare mineral earth is the only acceptable foundation. The ground must feel nothing beneath your boots. Any hidden object becomes a weakness, a point where the paving will eventually fracture.
Excavating to the Correct Depth
The ground you stand on is being measured by the sky. A rule of thumb for SmartStone paving installation holds that excavation depth must account for the pavers themselves, the bedding sand, and the compacted base layer. This common requirement usually lands between 150 and 200 millimetres. Cutting this depth short invites a slow, visible failure; the surface will shift with every heavy rain.
The excavation process is a straightforward sequence of removal:
1. Strip the topsoil to the depth calculated for your specific base material.
2. Remove the spoil from the site to keep the workspace clean and dry.
3. Inspect the exposed floor for soft spots or buried roots that were missed earlier.
I create a shallow tray with perfectly straight edges. The base material, typically crushed stone, gets laid and compacted in layers. A plate compactor passes over each lift until the surface rings solid. The final grade must fall away from any structure at a slope of roughly 15 millimetres per metre. I check this with a straightedge and a spirit level, walking every line to feel for subtle undulations. Only a perfectly struck, level base will carry the SmartStone paving installation without future movement.
Installing a Geotextile Membrane
The soil lies bare now, stripped of its top layer and scraped to a clean, level shelf. Before a single paver can rest, this exposed floor needs a barrier against the earth’s quiet ambitions. A geotextile membrane, a woven sheet of polypropylene, separates the crushed stone base from the subsoil beneath. It stops fine particles from migrating upward into the base layer, which would compromise its stability.
The membrane unrolls in long strips across the compacted floor. Overlap each adjacent sheet by at least 200 millimetres. When I pull the fabric taut and pin the edges with landscape staples, I create a separation that keeps the SmartStone paving installation stable through seasonal shifts and heavy storms. This fabric also allows water to drain through while preventing the base from sinking into softer ground.
Seams require particular attention. Where two sheets meet:
1. Overlap the edges by a minimum of 200 millimetres.
2. Secure the overlap with staples spaced every metre.
3. Add a bead of polymeric sand along the seam for extra rigidity.
A membrane installed with care prevents the intermixing of soil and stone. Without it, the base layer slowly disappears into the earth, and the pavers above settle into a wavy, uneven surface. The material costs little, but the protection it offers the SmartStone paving installation is lasting.
Building a Stable Sub-Base
With the membrane down, the sub-base carries the entire load. SmartStone paving installation starts here, so it gets my full attention. I lay crushed stone in lifts of 75 to 100 millimetres, compacting each pass with a vibrating plate. The material must be well-graded, with fines filling the gaps between larger stones. This creates a solid, stable mass.
I check the surface as I go. The fall must match the finished paving gradient, about 15 millimetres per metre. Any soft spot gets dug out and recompacted before moving on.
The key checks during compaction:
- Confirm the compacted depth meets the plan
- Test for evenness with a straightedge
- Confirm the fall pushes water away from structures
A weak sub-base shows up later as settling pavers. That is why SmartStone paving installation depends on this layer. Get it right, and the pavers sit solid for decades!
Compacting the Base Layers
The strength of a paved surface is decided before the first paver is laid. With the sub-base compacted, the base layer forms the final platform. I spread a finer, cleaner aggregate about 50 millimetres deep and work it until it becomes a dense, level plane.
Compaction demands consistency. The moisture content must stay even. The vibrating plate makes overlapping passes, and a straightedge checks the surface after each sweep. A straightedge reveals hollows the eye misses. The fall still needs to hold at 15 millimetres per metre, directing water away from structures.
- Maintain an even moisture content
- Overlap each plate pass by one third
- Recheck the fall after compaction
This is where SmartStone paving installation gains its long term stability. A true, unyielding base layer keeps pavers level, joints tight, and the surface intact for years. For SmartStone paving installation, skipping this phase invites costly repairs later.
Laying SmartStone Pavers
Setting the Sand Bed
The sand bed is the last thing between you and a flawless SmartStone paving installation. Get this layer wrong, and you will feel every mistake underfoot for decades. Screed rails guide the level. Pull them at exactly 25 millimetres below your final paver height. Use a straightedge to strike off the sand in a sawing motion.
River sand works best here. Building sand compacts too tightly, preventing drainage and making adjustments nearly impossible. I have seen sand beds fail because someone skipped this step. Keep the sand slightly damp, not wet. Dry sand shifts under your knees. Wet sand clings to your screed bar and leaves furrows you cannot see until the pavers are down.
Manageable sections keep the sand undisturbed. Screeding only the area you can lay in one session protects the level. In any SmartStone paving installation, foot traffic destroys a perfectly prepared bed in seconds!
Establishing a Reliable Screed
Every straight line in a SmartStone paving installation starts with two parallel rails. If those rails bow, flex, or settle, the finished surface betrays the flaw. I check mine with a 1.5 metre spirit level before and during laying. Sand shifts. A quick recheck saves you from lifting pavers.
Work from a flat board across the bed. Kneeling on sand creates low spots that become puddles. The first course sets the pattern, aligned to a taut string line and verified with a straightedge.
For a reliable screed, three things matter:
- Rails sit on compacted ground, not loose sand.
- Rail height gets checked at both ends and the centre.
- Striking off uses a sawing motion to avoid dragging sand.
Each paver should drop into place. If it rocks, lift and adjust the sand beneath. The screed makes that predictability possible. It separates a straight-looking surface from one that is true.
Placing the First Row of Pavers
The perfectly prepared screed is your canvas, and now the true test of your SmartStone paving installation begins. The first row of pavers is the keystone of the entire project, anchoring the design and establishing the alignment for every subsequent course. In the paving trade, we often say a job is won or lost in the first three meters.
I place each paver with a deliberate, vertical drop, never sliding it horizontally into position, as that drags the fine sand and compromises the screed. This initial paver is set, aligned, and then checked with a spirit level across all its edges and diagonals. If this single unit is off, even by two millimetres, the error will accumulate across the span.
Once the first paver is set, the placement of its neighbours becomes a sequence of precise checks. My routine for the initial phase of the SmartStone paving installation is methodical:
– Verify the string line remains taut and true after each placement.
– Use a rubber mallet with a firm, even tap to bed the paver, not a heavy blow.
– Place a straightedge across the top of the new paver and the previous one to check for lippage.
– Confirm the joint width is consistent with the spacers used.
The rhythm of the work is hypnotic, but the focus must remain sharp. A single paver that is slightly high becomes a trip hazard; a paver slightly low becomes a puddle trap after a Highveld thunderstorm. Addressing these minute deviations immediately is far easier than correcting them once the adhesive has set. The result is a flawless, true plane that is the hallmark of a professional SmartStone paving installation.
Cutting Pavers for Edges and Corners
Once the first row is set, the next stage of your SmartStone paving installation involves cutting pavers to fit edges and corners. Few spaces work out to whole pavers, so expect to trim each border unit to the exact line.
Measure the gap, transfer the measurement to the paver, and mark the cut line with a pencil. Use a diamond blade on an angle grinder or wet saw. Cut from the finished face down to reduce chipping.
- Wear safety glasses and ear protection.
- Cut dry only with a dust mask, or use water to settle dust.
- Dry-fit each cut piece before applying adhesive.
Check the cut paver against its neighbours. The joint width should match the rest of the pattern. This process repeats for every corner and curve. Paying attention to these details keeps the whole SmartStone paving installation true, without gaps or raised edges.
Maintaining Consistent Joint Spacing
Consistent joint spacing requires constant attention during a SmartStone paving installation. Each paver should sit a uniform distance from its neighbour, typically 3 to 5 mm. I use spacer tabs or a measuring stick for this. The eye catches a wandering line instantly, even when joints are only a few millimetres off.
To keep the pattern honest, follow a simple procedure:
- Set a reference line for every course.
- Check the gap with a feeler gauge after each paver.
- Adjust with a rubber mallet before the adhesive cures.
Ignoring this creates wedges, shifting stones, and an unstable surface. A consistent joint also allows for thermal movement, which matters under the South African sun. The final result, with every line parallel and every gap equal, separates a professional finish from a pile of pavers. This precision ensures a durable SmartStone paving installation.
Securing and Finishing the Installation
Applying Edge Restraints
Edge restraints serve a practical purpose during any SmartStone paving installation. They lock the perimeter, stopping individual pavers from sliding outward when foot traffic or water pressure builds. I have seen projects where restraints were omitted, and the finished surface soon showed gaps along the border. That is a common failure mode, not a rare event.
Your restraint options include:
- Concrete haunching, which creates a rigid border along straight edges.
- Metal edging systems, effective for curves and tight radii.
- Treated timber or plastic sleepers, useful for temporary layouts.
After securing the edge, apply joint sand and compact the surface. The completed paving holds firm, ready for years of braai sessions and afternoon sun.
Filling Joints with Polymeric Sand
Over 80% of paver movement happens within the first year, and the joints are where the battle is won or lost. For a SmartStone paving installation, the final test is how well the joints are sealed.
Polymeric sand is not ordinary sand. It contains binders that activate with moisture, creating a firm matrix. I always sweep it deep into every gap, then mist the surface lightly. The resulting bond resists weeds, ants, and washout.
- Wait for dry weather before applying.
- Use a plate compactor after the mist sets.
That compaction drives the sand down and locks the pavers together. The surface becomes a unified field, ready for everything from heavy vehicles to weekend entertaining.
Compacting the Paver Surface
One pass with a plate compactor is never enough. I run the machine twice across a SmartStone paving installation, first in one diagonal, then in the reverse direction. Each overlap covers half the previous path. This crosshatch pattern removes the small voids that a single pass leaves behind. The polyurethane pad protects the pavers from scuffing, though I also adjust the pressure setting for lighter finishes.
Once the second pass is complete, I inspect the field for three things:
– lippage greater than 2 millimetres along any joint
– sand residue left on the surface
– movement in the cut pavers near the edges
The joint sand now sits fully compacted, with no gap between its matrix and the paver edges. Finishing means sweeping away the residual dust and hosing the surface clean, which reveals the uniform plane of the entire floor.
Activating the Joint Sand with Water
Water triggers the final bond in a SmartStone paving installation. I walk the perimeter first, then work inward with a fine mist from the hose. The moisture pulls the polymer from the sand, creating a gel that fuses each grain. I watch for a dark sheen on the pavers as the indicator of proper saturation. Here is my watering sequence:
1. Begin at the furthest corner.
2. Sweep the nozzle side to side.
3. Overlap each pass by a third.
4. Repeat from the opposite direction.
After ten minutes, I go over the field once more with a light spray. The joints now hold their shape against a thumb press. Curing for a few hours under the sun leaves a surface that resists shifting and weed intrusion. A SmartStone paving installation needs this hydration step to reach full structural integrity.
Aftercare and Maintenance for SmartStone
Sealing the Pavers for Protection
Once your SmartStone paving installation is complete, apply a high quality sealer. This shields the surface from oil stains, UV fading, and efflorescence. In South Africa’s harsh sun, the sealer locks in the pavers’ colour depth.
Allow 48 hours of dry weather after application. For daily care, rinse with water and use mild detergent for stubborn spots. Avoid harsh acids or metal brushes. Reapply the sealer every two to three years. Signs that resealing is due include:
- Water no longer beads on the surface
- The paver colour looks dull
- Oil stains penetrate quickly
These checks protect your installation’s integrity!
Routine Cleaning and Stain Removal
Once the sealer cures, the daily relationship with your SmartStone paving installation begins. A garden hose and a soft broom handle most of what life throws at it. Weekly rinsing removes dust, pollen, and grime before they settle into a film.
For stains on a SmartStone paving installation, speed matters more than any product. A spill left overnight bonds with the paver surface. Each stain type demands its own response:
– Oil or grease: cover with absorbent clay or bicarbonate of soda. Leave it until morning, then sweep and rinse.
– Wine, juice, or coffee: blot with a clean towel, then wash using mild dish soap diluted in warm water.
– Rust or mineral streaks: apply an oxalic acid based paver cleaner, then rinse thoroughly.
Never reach for muriatic acid or wire brushes! These erode the joint sand and scar the pavers themselves, so keep your cleaning kit to soft tools and mild detergents.
Addressing Weed Growth Between Joints
Even a well executed SmartStone paving installation will eventually encounter a weed or two. Polymeric sand resists germination, but wind blown soil and stubborn seeds find their way into tiny crevices. This is not a failure of the system. It is the natural persistence of plant life in South Africa.
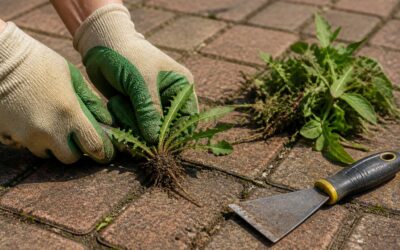
Pull weeds early. A weeding knife reaches deeper than fingers alone. Remove the root without disturbing the joint sand beneath. Once the weed is gone, the gap often closes on its own.
For persistent growth, homeowners prefer a targeted approach:
- Boiling water poured directly into the joint kills the weed without chemicals.
- A vinegar and salt solution works, but it must be applied carefully to avoid washing out the sand.
- Hand pulling remains the gentlest option for the surrounding pavers.
Each method serves the same purpose, preserving the integrity of the joints and the stability of the surface.
Periodic Re-sanding and Leveling
Seasonal rains and heavy foot traffic will eventually test the joints of any SmartStone paving installation. After a year or two, you might notice the polymeric sand sitting lower than the paver edges. That is the signal to refresh.
Re-sanding is a simple process. Sweep fresh polymeric sand into the joints, compact it down, and activate it with water. For leveling, identify any low spots where water pools after a storm. Lifting those pavers and adding a thin layer of bedding sand restores the smooth surface.
- Sandline sits uniformly below the paver surface.
- Water flows off without ponding.
- Paver edges feel flush underfoot.
These checks take minutes and protect the whole system!

0 Comments