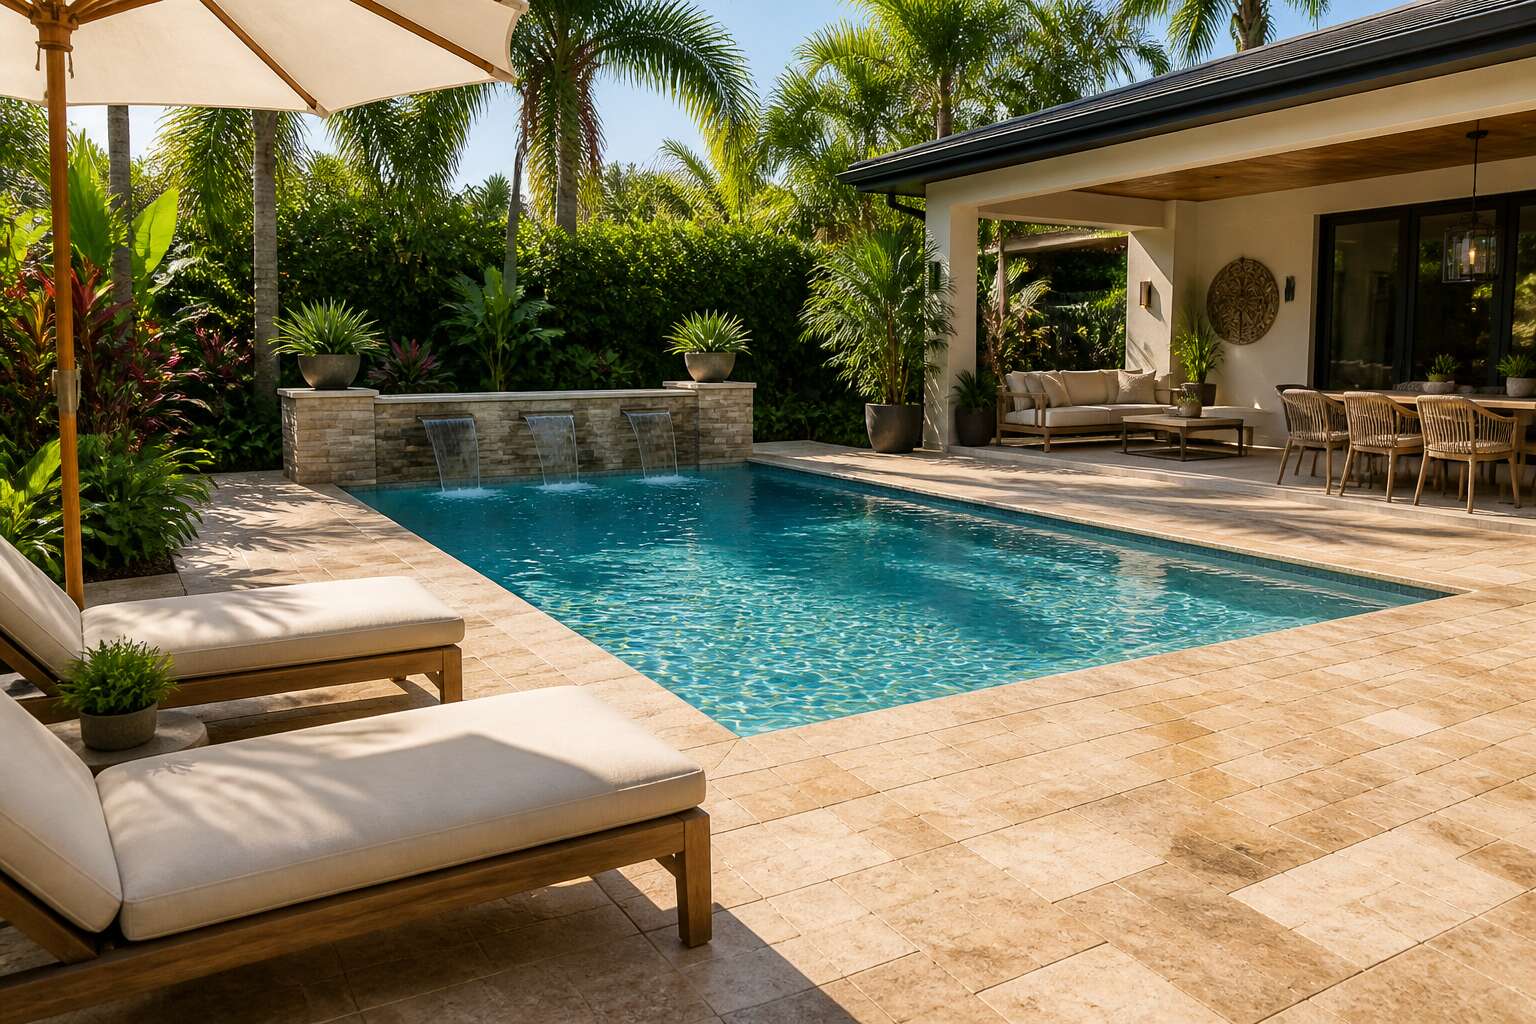
Choosing the Right Paving Material for Your Pool Surround
Concrete: The Versatile Classic
Concrete remains a steadfast choice for swimming pool surround paving, offering a balance of durability and affordability that few other materials can match. While it may lack the immediate visual drama of natural stone or the warmth of timber decking, its true value lies in its quiet adaptability to the South African climate and landscape.
For homeowners pondering the best surface for their aquatic retreat, the practicalities of a concrete surround are compelling. It withstands harsh UV rays, heavy foot traffic, and the inevitable splashes of chlorinated water without succumbing to rapid wear. Furthermore, modern finishing techniques have evolved; the days of plain, grey slabs are gone. You can now opt for textured surfaces that provide excellent slip resistance or exposed aggregate finishes that add a touch of sophistication while remaining functional. The material also plays well with underfoot temperatures, reflecting heat rather than absorbing it, which is a crucial consideration for our sunny days.
However, it is wise to approach this option with a clear strategy.
- Ensure proper drainage is planned to prevent water pooling.
- Consider a sealant application to guard against stains and moisture ingress.
- Choose a light-coloured finish to keep the surface cooler underfoot.
When installed with attention to these details, concrete for your swimming pool surround paving provides a resilient, safe, and clean aesthetic that frames the water beautifully. It is a decision that prioritises longevity and ease of use, creating a seamless transition from the patio to the pool edge that feels both grounded and intentional.
Pavers: Aesthetics and Flexibility
Choosing the right material for your swimming pool surround paving goes beyond mere aesthetics, it fundamentally shapes the safety and longevity of your outdoor space. While concrete offers a dependable, budget-conscious solution, exploring alternatives can unlock a new level of character for your South African home. The goal is to find a surface that remains cool underfoot during our blazing summers and provides secure traction when wet, ensuring every poolside step is a confident one.
Natural stone such as travertine or slate brings an earthy, timeless elegance that blends seamlessly with indigenous landscaping. These materials possess a naturally textured surface, which is an excellent defence against slips. Alternatively, porcelain pavers have surged in popularity for their remarkable durability and low maintenance. Their non-porous nature means they are highly resistant to the harsh chemical cocktail of chlorine and saltwater, preventing staining and fading over time.
– Travertine: Its porous structure naturally stays cool, but requires sealing to prevent water absorption.
– Porcelain: A robust and versatile option available in a vast array of wood or stone finishes.
– Slate: Offers a contemporary, rugged look with unrivalled slip resistance.
When making your final decision, consider how the material’s thermal properties react to direct sunlight. A dark, dense surface will absorb heat and become uncomfortable to walk on barefoot. By prioritising both visual appeal and practical function, your choice of swimming pool surround paving will create a serene and safe haven for many years to come.
Natural Stone: Timeless Elegance
Natural stone carries a story older than memory. For South African homes, travertine and slate create a swimming pool surround paving that combines geological history with everyday function. Travertine remains mercifully cool under highveld summer heat. Its pitted surface catches morning light and afternoon shadow with equal grace. Slate offers a darker, rugged temperament. Its cleft texture holds wet feet securely.
- Travertine: porous, requiring annual sealing, yet beautifully heat-resistant.
- Slate: dense, low-maintenance, with inherent slip resistance.
Both stones bear the quiet history of ancient seabeds and volcanic pressure. That depth is something manufactured surfaces cannot replicate.
Porcelain and Ceramic Tiles
When the conversation shifts to pool surrounds, the choice between porcelain and ceramic often surfaces as a quiet dilemma. Both offer a clean aesthetic, yet their performance under the unforgiving South African sun differs drastically. Porcelain, fired at higher temperatures, emerges denser and more resilient against sudden temperature shifts and heavy foot traffic. Ceramic, while more budget-friendly, possesses a higher water absorption rate, which can lead to cracking during frosty Highveld mornings. For a surface perpetually exposed to water and chlorine, this distinction is non-negotiable for longevity.
Key factors to weigh before making your selection:
– Slip Resistance: Look for a textured (R11 or higher) finish, which is safer when wet.
– Water Absorption: Porcelain is virtually waterproof; ceramic requires dense glazing to prevent moisture ingress.
– Colour Consistency: Porcelain often runs deeper through the tile, so chips are less obvious.
The tactile experience matters, too. A polished porcelain might glisten beautifully at midday, but it becomes a hazard after a swim. I have seen many homeowners seduced by the gloss, only to regret it post-installation. Conversely, a matte or flamed finish provides grip without sacrificing sophistication. Whether you lean toward the durability of porcelain or the economy of ceramic, the critical check is always the slip rating. There is no room for error when bare feet meet wet stone, so prioritise safety as your permanent fixture.
Travertine for Cool Feet
Under the Highveld sun, a pool deck can become unbearable. Travertine, formed from mineral springs, remains cool to the touch even after hours of exposure. Its internal voids prevent heat retention, which makes it a natural choice for swimming pool surround paving. I have walked across travertine at midday, and the ground remembers the morning shade.
The stone’s texture also helps. It offers grip without the roughness of other materials, and water does not turn it into a hazard. Travertine’s muted tones, from ivory to rust, absorb light rather than reflect it, which adds to the comfort.
- Cool underfoot, even in direct sun
- Naturally slip-resistant when wet
- Soft colour palette that complements garden foliage
Key Factors to Consider Before Paving Your Pool Surround
Safety and Slip Resistance
Surfacing the Real Danger: Safety and Slip Resistance
Here is where we separate the design dreamers from the soggy casualties. A pool surround is a temporary truce with gravity, and anions are sulking after adding chlorine to your water. The physics are unforgiving: dry paving offers traction, but the moment you add water, sunblock and a chaotic kid holding a juice box, that surface transforms into an impromptu ice rink.
Before you commit to aesthetics, consider the Zone of Lethal Capers. The area immediately adjacent to the waterline is a high-risk district. You need a textured finish, or at least a surface with a friction coefficient that doesn’t require a physics degree to calculate.
– The wet static coefficient of friction (the measurement for how your sole sticks when drenched).
– The rate of water drainage (does it pool, or does it vanish?).
– The presence of algae inhibitors in the mortar or sealant.
Beware of the polished look. A high-gloss finish might gleam in the sun, but it will also facilitate a rather dramatic meeting between your coccyx and the tiles. That is not luxury; that is percussive maintenance on your spine. The best swimming pool surround paving in Johannesburg or Durban often features a brushed or rumbled texture, sacrificing a little bling for a lot of friction. It is a trade-off between looking at your reflection and keeping your teeth intact.
Drainage and Water Management
Here is the article content, written to your specifications.
—
The area immediately surrounding your pool is a battlefield. It endures relentless sun, chlorinated splashes, and the constant footfall of wet, hurried kids. While the visual appeal of a patio is important, the true test of a successful installation lies in how it handles water. Forget the colour for a moment; focusing on the drainage and water management strategy is the key to a surface that remains safe and stable for years.
Many homeowners make a critical error by treating water as an afterthought. They select a beautiful stone, install it flat, and then wonder why puddles form after a summer storm. Stagnant water is more than an eyesore; it becomes a breeding ground for algae and a persistent hazard. The design must address water movement from the very first measurement.
Here are the core principles that govern effective drainage on any pool deck:
– Gravity is your ally: The surface must have a consistent fall, directing water away from the pool edge. A slope of 1 to 2 percent is typically ideal.
– Linear drains work best: Installing a continuous drainage channel along the pool’s perimeter captures surface water before it can travel across the paving.
– Consider the base: Water that seeps between pavers needs a correctly prepared sub-base (typically crushed stone) to allow it to filter down into the ground, preventing the pavers from shifting.
A common mistake is overlooking the relationship between the paving material and the water table. In areas with heavy clay soil, water does not drain naturally. Your swimming pool surround paving must therefore incorporate a membrane or a more robust drainage aggregate to cope with the lack of absorption. Without this, the hydrostatic pressure can cause the paving to lift and crack over time.
Another aspect to consider is the joint width. While a tight joint looks crisp, it offers limited permeability. If you are using a material like concrete or natural stone, the jointing sand or grout must be porous. This allows small volumes of water to escape downwards, preventing the surface from becoming a sheet of water during a downpour. The goal is to have the water vanish, not to have it linger and reflect the sun into your eyes.
The placement of drainage outlets also requires careful planning. You should not rely solely on the paving’s slope to carry water to a distant garden bed. Strategically placed gullies and channel drains break the path of the water, collecting it before it reaches high-traffic zones, such as the path to the outdoor shower or the braai area. This proactive approach reduces the amount of moisture tracked indoors and minimises the risk of slip-and-fall incidents.
Ultimately, a paved pool surround is a complex hydrological system. The performance of your paving is directly tied to how well you have considered the journey of every raindrop and every splash. By prioritising the fall and the subsurface drainage over pure aesthetics, you will avoid the costly disruption of re-laying a beautiful, but flawed, patio. Get the water management right, and the surface will remain a solid, dry, and welcoming space for all.
Heat Retention and Comfort
The South African sun is not a gentle presence. On a clear Highveld afternoon, the radiant heat loading on an exposed patio can drive surface temperatures past 50 degrees Celsius. Your choice of swimming pool surround paving dictates whether that heat becomes a welcome warmth or a searing barrier between you and the pool. This selection is about daily comfort as much as it is about aesthetics.
Thermal mass is the silent ruler here. Dense materials like natural stone and concrete absorb heat slowly and release it slowly. In the late afternoon, this stored heat creates a pleasant warmth underfoot. But for the midday barefoot walk, that same thermal storage can feel like a skillet. Lighter coloured surfaces reflect a significant portion of solar radiation, whereas darker tones capture it. The geometry of your pool area also matters; a surround tucked against a north facing wall receives amplified heat reflected off the masonry.
The contrast between the paving and the environment determines the microclimate. A surface with high thermal conductivity will pull heat away from your feet quickly, offering a transient cooling effect. Materials with high porosity, such as travertine, have low thermal conductance and remain cooler to the touch in direct sunlight. This is why they are favoured for high traffic areas. The paving texture influences comfort as well:
– A smooth, polished finish reflects glare and heat.
– A tumbled or brushed finish reduces the contact area with your skin.
– A textured surface absorbs direct light rather than reflecting it.
The pain of a hot surface forces a subconscious decision: move quickly or avoid the area entirely. When selecting your swimming pool surround paving, the thermal properties should be weighed against your daily routine. If you plan to lounge barefoot during peak sun, the material’s affinity for heat storage is a primary factor. If you prefer evening gatherings, a material that retains heat will extend the usability of your space.
Choosing a material based purely on its surface appearance ignores the physics of heat exchange. The pavement you walk on is a thermal reservoir that interacts with your comfort threshold. Considering the orientation of your pool and the typical hours of use will guide you to a surface that remains temperate when you need it most. The right selection is a quiet negotiation between climate, material science, and personal habit.
Maintenance and Upkeep
Nobody imagines the scrubbing when they first admire a pristine terrace. The truth is, a poolside demands a ritual of care, and the South African climate makes no allowances for neglect. Between the chlorine splash and the autumn leaves, a weekly sweep is the minimum courtesy!
- Rinse with fresh water to remove chemical residue.
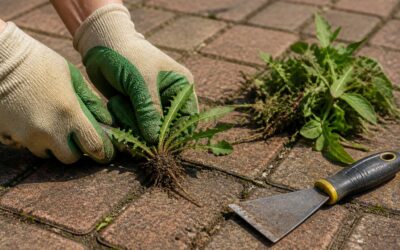
- Brush joints and seams to discourage opportunistic weeds.
- Inspect for chipped edges or shifting slabs.
Sealants protect porous surfaces from staining, but reapplication is a task for the dry season. The maintenance burden of your swimming pool surround paving should be calculated before installation, not discovered afterwards. A little diligence prevents the slow degradation that turns a showpiece into a liability.
Budget and Long-Term Costs
South African homeowners often learn the true cost of their pool terrace after the contractor’s final invoice. Swimming pool surround paving stretches into every subsequent season, hidden in cracked grout, lifted edges,and premature replacements.
Consider material costs first. Porcelain resists chlorine and UV but demands precision installation; pressed concrete costs less initially but requires sealant replacement. Coastal salt erodes certain stone quickly; inland frost affects thickness choices. A structural engineer’s soil report adds an upfront fee but prevents re-levelling expenses later!
- Excavation and disposal of removed soil
- Geotextile membrane beneath joints
- Sealant for porous finishes
- Access for delivery vehicles in tight driveways
Every rand spent on the base of your swimming pool surround paving protects against future excavation costs. Removing one paver now costs an hour of a tradesman’s time; removing twenty later costs you a weekend. Plan accordingly.
Installation Process and Best Practices
Preparing the Ground: Excavation and Base
A beautiful surface begins long before the first paver is laid or the first slab is poured. The true craft of any swimming pool surround lives beneath your feet, hidden in the soil and stone that bear the weight of daily life. Cutting corners here leads to cracks, settling, and uneven surfaces that ruin the entire aesthetic within a few seasons.
The excavation phase demands more than simply digging a hole. Your contractor must remove all topsoil and organic matter, which decomposes and shifts over time. The depth of this cut depends on your chosen material, but it must account for both the base layer and the surface thickness. If the soil reveals poor drainage or expansive clay, a geotextile fabric and additional gravel become necessary to prevent future movement.
Once the excavation reaches its proper depth, the focus shifts to the base. A crushed stone aggregate, typically 100 to 150 millimetres deep, provides the structural integrity your surround requires. This layer must be compacted in lifts, meaning you cannot simply dump the gravel and hope for the best. Each section gets tamped and levelled, creating a dense, stable foundation that resists the relentless pressure of water and weather.
– Verify the base thickness matches the manufacturer’s specifications for your chosen material.
– Confirm the soil type beneath the gravel drains properly; standing water destroys foundations.
– Ensure the final grade slopes away from the pool at roughly 2 percent to direct runoff.
After compaction, a sand or stone dust setting bed levels the surface and allows for minor adjustments during installation. This layer is thin, usually 25 to 40 millimetres, so precision matters. The entire process feels meticulous because it must be. Every kilogram of weight your swimming pool surround carries depends on the integrity of this unseen framework, and patience at this stage pays dividends in decades of clean, stable outdoor living.
Laying the Paving: Techniques and Tips
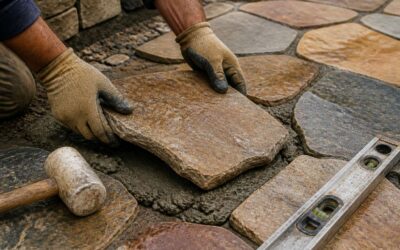
The setting bed is level, a fine, sandy plane awaiting its permanent tenants. Laying the swimming pool surround paving is where the patience of preparation meets the finality of placement. Each paver or slab is eased into position by hand, not dropped, and a gentle tap with a rubber mallet seats it without shattering its delicate edges. The tradesperson works from a kneeling board to avoid disturbing the fresh bed, checking each piece for perfect alignment against taut string lines.
The technique demands a constant awareness of the overall pattern. Joints must stagger, creating a visual rhythm that also distributes load more effectively across the substrate. Manufacturers specify joint widths, often between 3 and 10 millimetres, and these gaps are maintained with spacers or a practiced eye. A spirit level rests across multiple units at every stage, ensuring the surface follows the prescribed slope away from the water, maintaining that 2 percent fall you established during the base work.
Here, in the heat of the day, with the sun bearing down on exposed sand, the work is both repetitive and precise. It is a quiet obsession with the details that most will never consciously notice, yet everyone will feel underfoot for decades.
– Observe how the installer handles the cuts at the pool edge and corners; a skilled hand makes these junctions look seamless.
– Watch that the tradesperson cleans the surface as they go, removing excess sand or adhesive before it sets.
– Confirm the material is being placed dry over the setting bed, unless the installer specifies a wet mortar for your particular slab weight.
The cuts themselves are the true test of craftsmanship. A straight run of full pavers is simple enough, but the curved lip of a freeform pool demands intricate saw work that transforms whole units into custom pieces of a larger mosaic. These cut pieces are the transition between the straight lines of the garden and the organic shape of the water, and the skill with which they are executed defines the entire perimeter. It is this slow, deliberate placement of every single piece, this unhurried final dance of material and ground, that separates a mere patio from a genuine centerpiece. The work is not complete until the last edge piece is chiseled, the last line is checked, and the entire canvas of stone is left to settle quietly under the African sunchers.
Creating Proper Slopes for Drainage
There is an underappreciated art to making water run away from a pool, and it has nothing to do with the water itself. It concerns the ground beneath your feet. A perfectly flat swimming pool surround paving spells disaster, turning a luxury feature into a boggy marshland after the first Highveld thunderstorm. The slope is decided long before a single paver is laid, usually during the final grading of the subgrade, and the installers must conform to these existing levels.
The drainage slope, typically between 1.5% and 2%, is not a suggestion; it is a law of physics rendered in stone. The fall directs the runoff away from the pool edge and toward designated drainage channels or garden beds. If the paving is laid flat or with a low spot, water will pool, creating a breeding ground for mosquitoes and a stubborn surface stain. The entire process is a constant dialogue between the level, the straight edge, and the string line, ensuring the surface is flat in every direction except the one where water should be going.
Consider the practical sequence a competent installer follows to avoid a future lake:
1. Check the adjacent drainage points to confirm the flow direction is clear and unobstructed.
2. Set up temporary profile boards to define the exact height of the finished surface at all corners.
3. Use a screeding rail, not a length of old pipe, to pull the damp mortar bed to the precise thickness.
4. Verify the slope with a two-meter straight edge and a level, adding a 10mm packer to simulate the required fall.
5. Re-check the perimeter after the first row is laid, because everything shifts during installation.
Water is an opportunist, and it will find any depression in the surface. This is why webbing and spot checking are paramount. The fall must be gradual enough to remain comfortable underfoot, yet present enough to move water with purpose. A slope that is too aggressive will be uncomfortable to walk on, while a slope that is negligible is pointless. For a standard rectangular pool, the drop is usually directed away from the coping stones, using careful adjustment of the screeding rails to ensure the critical drainage lines are maintained exactly.
The final test is always a bucket of clean water thrown onto the finished surface. It should track toward the drain in a clear, swift stream, leaving only a damp trail behind. This is the quiet verification process that every satisfactory swimming pool surround paving must undergo before you ever put a chair on it. The definition of successful drainage is boring, unobtrusive movement, and the complete absence of a puddle.
Sealing and Finishing Touches
The moment the design is approved, the true craft begins. Expertise in swimming pool surround paving isn’t found in the showroom; it is proven on site, where the quality of the foundation dictates the longevity of the finish. While the aesthetic appeal of the material captures the eye, the unseen preparation below ensures the surface remains safe and stable for decades. A professional crew understands that cutting corners here compromises the entire project, regardless of how premium the chosen paver might be.
The process begins with a meticulous excavation, reaching a consistent depth that allows for a substantial base layer. This is not a job for haste; it requires a careful eye to ensure the subgrade is uniformly compacted. Many homeowners overlook the importance of this stage, but it is the bedrock of a durable installation. Once the ground is stable, a geotextile membrane is often laid, followed by layers of crushed rock, each meticulously compacted to create a dense, shock-absorbing foundation that resists the shifting forces of the South African climate.
With the foundation set, the installation progresses to the bedding layer and the precise laying of the units. The margin for error is virtually zero. The following sequence represents the non-negotiable standard for a flawless finish:
1. Screed the Bedding: The sand and cement mix must be perfectly damp and screeded to an exact, even plane.
2. Lay with Precision: Place each paver with a gentle twisting motion to fully seat it into the bedding, ensuring full surface contact.
3. Establish the Joints: Use spacers to maintain consistent, uniform joint widths, which are crucial for the final locking process.
4. Compact and Lock: After laying, the surface is compacted with a plate vibrator, and kiln-dried sand is swept into the joints to interlock the units. This step is repeated until every joint is completely full.
This meticulous approach prevents the common issues of lippage and movement that plague poorly installed surfaces. The final stage involves the application of a high-grade polymeric sand or sealant, which hardens the joints to inhibit weed growth and washout. The result is a surface that exhibits a clean, crisp appearance, with the intrinsic beauty of the stone or paver allowed to shine. It is this marriage of rigorous process and premium material that ultimately defines the value of the investment, creating a safe, durable, and visually stunning environment that truly weathers the test of time.
Design Ideas to Transform Your Pool Surround
Creating a Seamless Transition with Your Landscape
The pool deck often determines how the entire garden feels, acting as a visual bridge between the structured home and the wilder landscape beyond. Many homeowners focus solely on the water, yet the true magic happens at the edge where the paving meets the lawn. A hardscape that stops abruptly creates a visual wall; one that flows outward invites the eye to travel, making the property feel larger and more cohesive.
To achieve this integration, the materials you choose must echo the natural environment. Consider how the colour of the stone reacts with the surrounding foliage and soil. A warm, earthy tone can anchor a tropical setting, while a cooler grey might suit a more arid, fynbos-inspired garden. The goal is to select a surface that looks like it has always been there, not one that was dropped in from a catalogue. Texture also plays a critical role in this transition, softening the boundary between the built and the organic.
Here are a few key ways to ensure your surround blends effortlessly:
– Carve out planting pockets: Leave strategic gaps in the paving for ground covers or ornamental grasses to spill over the edges.
– Match the jointing material: Use a similar sand or gravel in the joints as you have in the garden paths to visually tie the areas together.
– Create a stepping-stone effect: Gradually transition from a solid pool deck into individual pads that meander toward the garden beds.
Ultimately, the best designs treat the paving as a unifying element rather than a standalone feature. When the hardscaping mimics the natural flow of the land, the entire outdoor space becomes a single, inviting environment. This seamless connection encourages movement and creates a serene backdrop for relaxation, turning the pool area into a true extension of the landscape rather than a separate destination. The addition of natural finishes, such as tumbled stone or exposed aggregate, can further soften the transition.
Adding Accent Features: Border Patterns and Inserts
The difference between a functional pool deck and a memorable one often comes down to a single row of contrasting pavers. Attention to border patterns and inserts transforms swimming pool surround paving from a plain surface into a curated composition. These accents define zones, direct attention, and add visual interest that plain expanses lack.
Consider a rope border using narrow brick or a geometric grid of metal strips embedded in the concrete! Inserts like circular medallions or leaf motifs can break up large areas without overwhelming the design. Typical cohesive elements:
- A darker border creates a crisp edge against the lawn.
- Decorative tiles at corners anchor the layout.
- Textured inserts matching the stone colour add subtle relief.
Restraint provides the necessary counterbalance. Too many patterns distract from the water’s calm surface. A single accent placed at intervals creates a consistent texture. A well executed border pattern makes your swimming pool surround paving feel intentional, not busy!
Color Schemes and Styling Tips
The hours you spend poolside are defined by the atmosphere you create, and color is the most direct way to set that mood. While the structural advice covered earlier focuses on materials and installation, your choice of shade for the swimming pool surround paving is where personality emerges. A stark, white concrete deck can feel blinding under the African sun, whereas a warm, sandy beige absorbs light and radiates a natural heat that feels welcoming. I often advise clients to look at the local landscape, the tones of the surrounding bush or the coastal dunes, and pull a hue from that environment to anchor the pool visually.
Dark tones offer a striking contrast, especially against a light blue water line, but they demand a practical mindset. They can become intensely hot on bare feet, and they tend to show every bit of mineral dust. Lighter shades, in contrast, stay cooler and hide the inevitable patch of dry grass or fallen leaves. The best approach is often a strategic blend.
Consider these styling options for a cohesive look:
- Use a single dominant tone for the main expanse and a darker shade for the border to define the area.
- Incorporate a subtle textured finish in a contrasting colour to add grip without altering the temperature profile.
- Select a paver with a blended, multi-tone surface that offers visual interest with less maintenance than a solid colour.
Ultimately, the goal is a seamless dance between the hard landscaping and the fluid water. A soft, earthy palette will make the swimming pool surround paving feel like a natural extension of the garden, while a crisp, cool grey can evoke a modern, resort-like aesthetic. The right colour transforms the area from a mere functional basin into a sanctuary, encouraging you linger longer. The texture underfoot and the visual weight of the colour will dictate how the space feels from dawn until dusk, influencing every moment of your leisure.
Integrating Lighting for Night Ambiance
As the sun dips behind the koppies, the pool area often becomes an afterthought. Yet, this is precisely when your swimming pool surround paving can transform into the most compelling part of your property. The design decisions made during the day dictate the atmosphere after dark, and thoughtful lighting is the mechanism that drives this shift.
The key is layering. A single floodlight mounted on the house wall creates a flat, harsh glare that washes out the texture of your paving and leaves the edges in darkness. Instead, consider up-lighting from recessed fixtures set within the paving itself or positioned behind planters. This technique grazes the surface, highlighting the natural cleavage of slate or the precise joints of clay pavers. It adds a three-dimensional quality that is lost in standard illumination.
Integrating lighting into the paving layout requires planning during the installation phase. You cannot easily retrofit a recessed light into an existing mortar joint without risking damage.
– Step lights: Recessed into the riser of a step, these guide foot traffic safely.
– Bollards: Placed at intervals along the perimeter, these provide a wash of light across the surface without blinding swimmers.
– In-ground up-lights: Positioned to highlight a feature tree or a dramatic texture in the paving material.
The result is a space that feels both secure and sophisticated. With the ambient glow reflecting off the water and the defined silhouettes of your paving stones, the pool deck becomes a living area, not just a wet zone. This approach turns a practical necessity into a defining feature, ensuring the space is used long after sunset.
Common Mistakes to Avoid and Maintenance Tips
Overlooking Slip Resistance
Even the most beautiful swimming pool surround paving can become a hazard if the finishing touches go wrong. Many homeowners select high-gloss materials for their aesthetic appeal, overlooking the fact that water transforms these surfaces into skating rinks. The common mistake is prioritizing looks over the coefficient of friction, especially around the deep end where splashing is constant.
Algae finds a foothold in the tiniest of imperfections. If your paving has a textured surface, you might think you are safe, but organic growth builds a slippery biofilm that negates all grip. This is where maintenance steps in as your primary defense.
– Schedule a monthly clean with a sodium hypochlorite solution to kill spores.
– Use a stiff-bristle brush, not a pressure washer, which can etch the finish.
– Inspect the drainage channels weekly to prevent stagnant water pooling.
– Apply a penetrating sealer designed for wet zones every two years.
Neglecting the water chemistry can also degrade the paving material itself. Imbalanced chlorine levels eat away at the grout line, creating a rough edge that traps debris, making the surface uneven and more treacherous. That’s where the real slip risk lives. The quiet solution isn’t a chemical coating; it is preventing the problem at the source by ensuring your chosen swimming pool surround paving has a certified anti-slip rating before installation, not after.
Ignoring Drainage Requirements
Getting the drainage wrong with swimming pool surround paving is a quietly destructive failure. Water that has nowhere to go will find the lowest point, and it will take the bedding sand with it. The result is a slow, invisible erosion beneath the pavers, leading to hollow spots that crack under weight long before the surface shows any distress.
The common mistake is assuming a gentle slope is enough. In practice, a fall of 1.5 degrees is the absolute minimum for effective run-off. Anything less encourages ponding in the joints. Pool water carries chlorine and stabiliser residue, which accelerates the breakdown of polymeric sand. That breakdown creates a path for water to undermine the sub-base completely. A swimming pool surround paving installation that looks level is often the most dangerous one.
Settlement after heavy rain is another red flag. If the drainage channel is placed too close to the coping stone, the splash zone creates a constant cycle of wet and dry, which fatigues the jointing material. The channel needs to sit far enough away to catch overspray, not just direct flow. Regular maintenance on the drainage itself is non-negotiable:
– Clear the grate covers weekly to remove leaf litter and insects.
– Flush the channel with a hose monthly to keep the outlet pipe clear.
– Check the outlet for root intrusion from nearby shrubs in autumn.
Preventing core erosion matters more than any surface treatment. If the paving begins to feel uneven underfoot, the sub-base is already compromised. A solid foundation, intentional fall, and a drainage system that is actually maintained form the only defence against structural failure of swimming pool surround paving. Ignore that, and the surface will look excellent while silently rotting from below. The paving becomes an aesthetic cover for a sinking void, which is the worst possible outcome for both safety and longevity.
Skipping the Sealing Process
Skipping the sealing process is the financial equivalent of buying a bespoke suit and then using it to paint the ceiling. It is the single most common act of self-sabotage in swimming pool surround paving, and it usually stems from a desire to save a few hundred Rand during the installation phase. That decision costs thousands later. Unsealed pavers in the South African climate face a relentless assault from UV radiation, pool chemical splashes, and the occasional braai oil disaster.
The irony is that many homeowners believe sealing is purely about aesthetics, a way to make the colour pop. In reality, the protective layer is what stops the surface from becoming a sponge for every contaminant that touches it. Without this barrier, the capillary action of the paving draws moisture and chlorinated water deep into the body of the stone or concrete, which is where the real degradation begins.
A common misconception is that a single coat of sealer is a permanent solution. It is not. The product breaks down under UV light, which is abundant in this country. The maintenance schedule is simple, but it requires discipline:
1. Apply a fresh coat every 12 to 18 months, depending on the manufacturer’s specification.
2. Test the water beading effect after winter to see if the protection has worn off.
3. Reapply immediately if you notice the surface darkening unevenly when wet.
Sealing also changes the maintenance dynamic. A sealed surface resists algae growth and makes the weekly cleaning routine substantially more effective. Unsealed swimming pool surround paving holds onto grime in its microscopic pores, creating a permanent grey film that no amount of high-pressure washing will ever remove. The physical wear from foot traffic, especially around the pool edge where people constantly walk, accelerates the erosion of the surface finish. That erosion creates rough spots that trap dirt, which then grinds deeper into the material with every step.
The cost of sealant is negligible compared to the cost of replacing stained or spalled pavers. Treat the sealing process as a recurring expense, not an optional extra. It is the difference between a surface that ages gracefully and one that looks tired, blotchy, and weathered long before its time.
Regular Cleaning and Care
Repairing Cracks and Damage
One recurring blunder with swimming pool surround paving is treating every crack as an identical villain. A hairline fracture near the pool edge demands a different response than a chunky break from a dropped cooler. Using ordinary mortar for both guarantees the repair will fail again. South African ground shifts constantly, and rigid materials cannot absorb that movement.
- Ignoring stains that accompany cracks, which signal water intrusion.
- Grinding cracks wider without cleaning the debris thoroughly.
For actual repair work, a flexible polyurethane sealant outperforms many commercial alternatives. Matching the original material matters, because a dark patch on light stone becomes a permanent eyesore. Inspect the perimeter regularly and address damage within a week. Small fixes cost far less than replacing entire sections of swimming pool surround paving. Dampness breeds algae. A repaired crack that seals poorly invites worse trouble later.

0 Comments