Planning and Preparation
Assessing the Site and Soil Conditions
Before you learn how to install brick paving, you must first understand the soil. The ground beneath your feet dictates drainage, stability, and the long-term performance of your work. A site that appears level may hide soft spots or shifting sands, and these will betray your effort within a season.
Dig a test pit to inspect the soil profile. Clay expands when wet, while sandy soil drains quickly but offers less support. For each site, evaluate the following:
- Drainage patterns during heavy rain
- Depth of the water table
- Presence of tree roots or buried services
I always check the ground after a downpour, because standing water reveals a lot. This assessment prevents sinking pavers later.
Calculating Material Quantities and Costs
Assess the site and soil conditions before planning your brick paving. Check drainage patterns and the depth of the water table. These factors affect stability and long term performance, so they guide your preparation.
Calculate material quantities and costs by measuring the area accurately and adding about 5% for waste. For a complete list:
- Bricks or pavers
- Bedding sand and joint filler
- Base material and edging restraints
Compare supplier prices and include delivery fees. Proper planning prevents costly mistakes and ensures a durable installation.
Gathering Necessary Tools and Equipment
Before laying a single paver, gather every tool on your checklist. A missing trowel can halt your entire project midday. The right equipment transforms the laborious process of learning how to install brick paving into a satisfying ritual. Essential hand tools include:
- Tape measure and chalk line
- Rubber mallet and level
- Chisel and bolster for cutting
A plate compactor is non-negotiable for settling the base, and a wheelbarrow moves aggregates efficiently. Organize your workspace logically: keep the compactor near the base materials, and hand tools within arm’s reach of the laying area. This simple step reduces fatigue and prevents accidental damage. Preparation is not glamorous, but it is the quiet foundation of every successful hardscape project.
Excavation and Base Preparation
Marking Out the Area and Setting String Lines
Excavation demands exactitude. The depth must accommodate compacted base material and pavers themselves, typically 150 to 200 millimetres below final level. After digging, spread crushed stone in layers and compact each one. Many installers rush this phase, only to face settlement later. A firm trench means the pavers will stay level for years.
To mark the boundary, string lines pulled taut between steel pegs create a crisp reference. This obviates guesswork. For a square corner, use the 3-4-5 triangulation method. Here is one efficient process:
- Drive a peg at each corner.
- Attach string at equal heights.
- Check diagonals for equality.
Adjust any sagging line before you begin digging. I always check my strings twice. The entire process of how to install brick paving relies on these simple lines.
Excavating to Proper Depth
Excavation demands honesty. The string lines give the outline, but the real test is what you remove. A shallow trench saves an afternoon and costs you years, as the base settles into a permanent slump.
Correct depth is 150 to 200 millimetres below final level, covering compacted stone and the paver itself. South African soil varies from loose coastal sand to dense Highveld clay. Both need the same discipline: dig deep, spread in layers, compact each one. Anyone learning how to install brick paving must respect this stage.
- Puddles after rain reveal low spots.
- A spongy feel underfoot means the base is too thin.
Excavation is preparation, not guesswork. The quality of that preparation determines how long the surface stays true.
Adding and Compacting the Sub-Base Layer
The ground has a long memory. Once the excavation is sealed, the sub-base determines whether your work will last or betray you. I have seen too many installations where the crushed stone was dumped in one generous heap and levelled with the back of a rake. A year later, those same pavers were shifting and pooling water in the low spots.
Compaction is not a formality. It is the process of forcing the stone to settle, layer by layer, until it becomes a slab that will not move. Anyone serious about how to install brick paving learns to read the machine’s rhythm. The throttle rises, the vibration deepens, and the stone grows quiet. That silence is the only guarantee you get.
Installing Edge Restraints and Bedding Sand
With the sub-base compacted to a drum-tight finish, the next move in how to install brick paving is to lock the edges. Restraints are not optional; they are the silent anchors that keep every paver from wandering under the weight of traffic or the pull of water. Concrete haunching along the perimeter is the traditional choice, though plastic or steel edging systems offer a cleaner line and faster installation. Whichever you select, set it below the final paving level so the edge remains invisible once the work is complete.
Bedding sand is where precision matters most. A washed, sharp sand with a particle range of 1 to 4 millimetres will compact reliably without draining away. Spread it to a uniform depth of 25 to 30 millimetres, no more, no less. To achieve this consistent bed, lay a pair of parallel pipes across the area and screed the sand flat with a straight board.
– Screed in one continuous pass, do not stop and restart mid-way.
– Do not compact the bedding sand, it must stay loose for the pavers to settle into.
– Keep the sand dry, damp sand will not screed evenly.
Each of these steps is straightforward, yet they are the difference between a terrace that settles beautifully and one that dips with the first rain. The sub-base carries the load, the edges contain the shape, and the sand bed welcomes each brick into its final resting place. With the sand level and edges firm, you are ready to begin the laying pattern that will define the surface for decades.
Leveling and Grading the Sand Bed
Leveling the sand bed is where patience pays. Even a 3 millimetre dip in the bedding layer becomes a visible hollow once traffic compacts the bricks. For that reason, the grading pass deserves the same attention as the sub-base beneath it.
Work in straight lines, always pulling the screed board toward you. Check the surface with a spirit level every metre or so, adjusting as you go. The goal is a flat plane that sheds water gently toward the drainage point, not a perfectly level slab. A slight fall of 1 in 80 is enough to move rain without creating a noticeable slope underfoot.
- Use a straight edge to test the sand bed in several directions.
- Fill any low spots with fresh sand, never compact the high spots.
- Work from the far corner toward the open edge to avoid disturbing what you have just graded.
This final grading is the quiet step that determines how well the whole surface performs. Get it right, and each paver will sit flush with its neighbour. Get it wrong, and no amount of joint sand will hide the unevenness. That is the real measure of how to install brick paving with confidence.
Laying the Bricks
Laying the First Course and Setting the Pattern
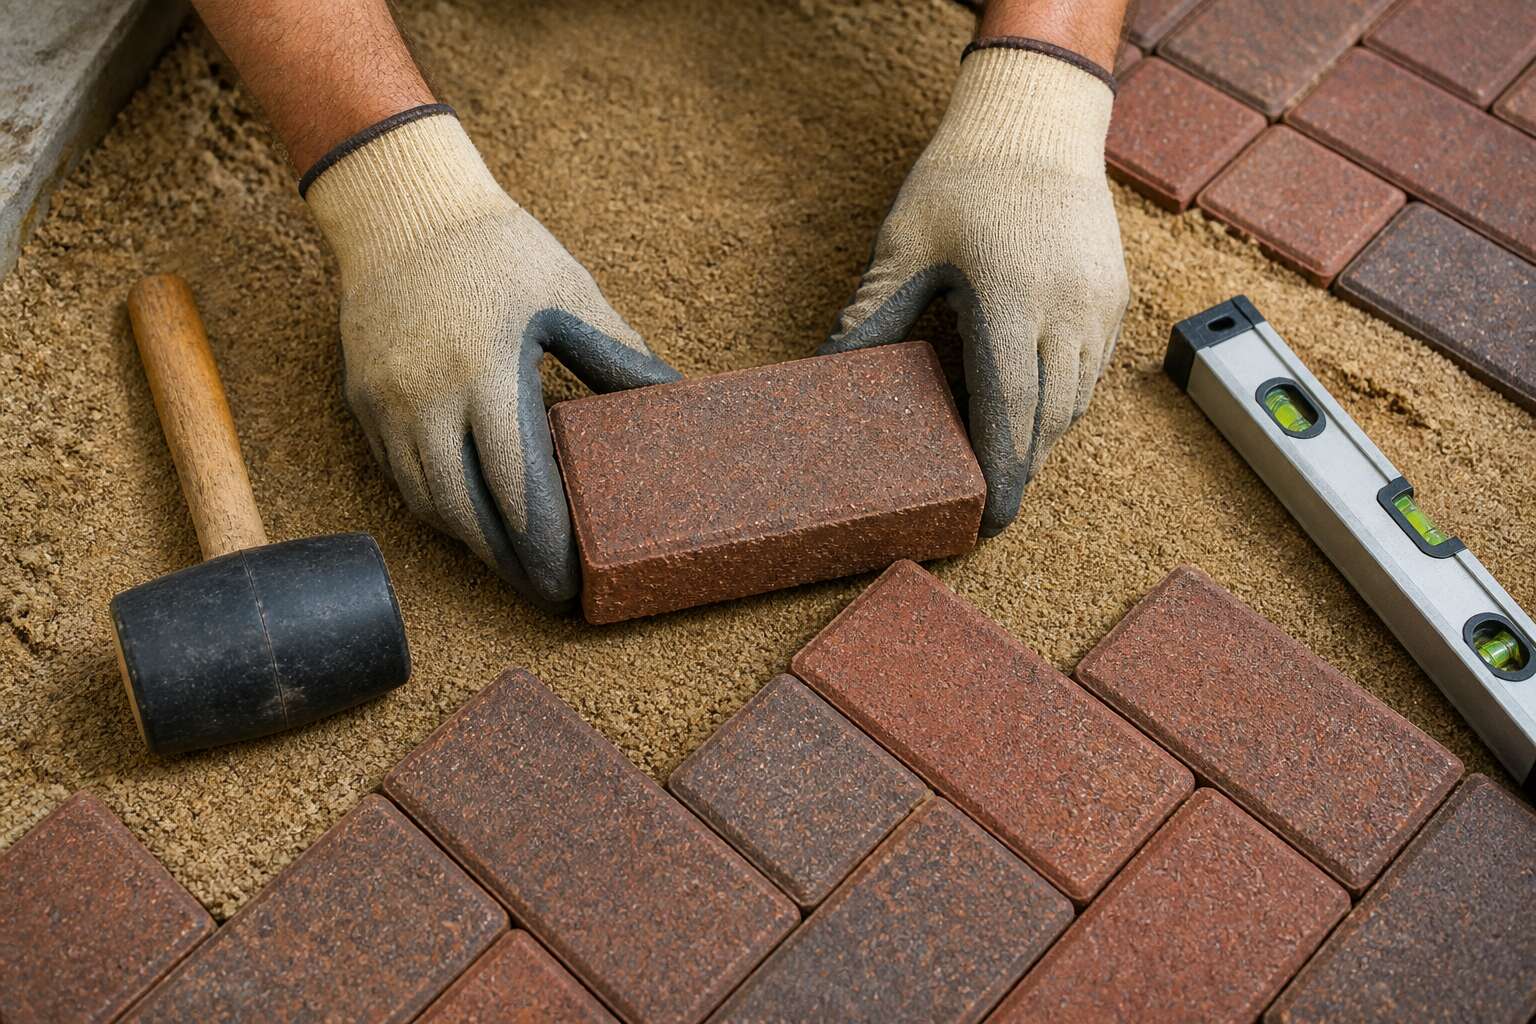
After the sand bed is leveled, the first course anchors the entire layout. Place each brick firmly, sitting it flush against the edge restraint. Use a rubber mallet to tap it down, but avoid heavy blows that shift the sand beneath.
Stagger the joints as you move outward, keeping a consistent gap for filler sand. A string line guides the straight edge. For a herringbone pattern, set the first brick at 45 degrees, then mirror the angle across the row.
- Check each brick with a spirit level
- Tap the sides to seat them tightly
This initial course sets the pattern for every subsequent brick. Accuracy here prevents drift and misalignment later. Knowing how to install brick paving begins with mastering this step.
Using Spacers and Maintaining Uniform Joints
There is a particular satisfaction in watching the gaps between bricks disappear into perfect, uniform lines. It is the difference between a pavement that looks artisan and one that looks like a mistake. Once your first course is set, the temptation is to eyeball the spacing for speed. Resist that impulse. A few millimeters of drift here becomes a yawning chasm by the time you reach the patio edge.
Proper spacers, usually plastic crosses or simple offcuts of timber, are the unsung heroes of this trade. They are not a suggestion; they are a necessity.
– They enforce a consistent joint width for the filler sand to lock into.
– They keep adjacent bricks from scuffing and chipping each other during the tapping process.
– They allow for the slight expansion and contraction that weather demands.
Slide the spacers between the bricks as you lay them, and tap the face of each brick with the mallet handle to seat it against its neighbor. The alignment remains true, and the rhythm of the work becomes meditative. It is a quiet, methodical process that yields a surface of remarkable order. This attention to the small spaces is where the real character of the work emerges, a detail that separates a craftsman from a casual laborer. Knowing how to install brick paving properly means respecting these silent margins.
Cutting Bricks for Edges and Curves
Laying the bricks is where the plan becomes pavement. You set each unit on the sand bed, working from the restraint inward. A rubber mallet does the persuasion. The real test comes when you reach a curve or a corner. Straight lines are easy; arcs require calculation.
- Measure the gap at the edge.
- Mark the brick, allowing for the joint.
- Score the line with a chisel or grinder.
- Break the brick and smooth the edge.
Cutting bricks for edges and curves separates a tidy job from a shambles. A clean cut looks intentional. A ragged one looks like a tantrum. Wear goggles and gloves. The dust will find your lungs otherwise. Learning how to install brick paving means accepting that not every brick will fit. Some will need a trim, and that is fine.
Checking for Level and Adjustments
Laying the bricks is a rhythm of placement and correction. The spirit level follows each brick down. Check across the joint and along the run. A high corner means tapping the low end with the rubber mallet. A low brick needs a lift and fresh sand. The surface will try to deceive you. Shadow lines mimic dips, and a rogue grain of sand under a brick creates a wobble that takes three adjustments to fix.
Keep a trowel and a bucket of sand nearby. When a brick sits proud, lift it, scrape the bed, and reset. Do not hammer it down. The sand will not compress evenly, and the bounce will return.
- Drag a thumb across each joint to feel for lippage.
- Rest the level across three bricks, not two.
- Look along the line at ground level; wobbles appear here first.
Moving brick by brick, the pattern grows. This is where knowing how to install brick paving becomes a tactile skill.
Filling Joints with Sand and Compacting
Once every brick is seated, the joints demand attention. Dry masonry sand is swept across the surface, working it into every gap with a stiff broom. Do not rush this pass. The sand settles as it trickles down, so refill the joints until they refuse to take more.
Compaction follows, and it is central to how to install brick paving. A plate compactor vibrates the sand deeper into the joints and locks the units together. Sweep another layer of sand before compacting, then repeat. Loose joints shift under foot, and that movement becomes a maintenance problem later.
When learning how to install brick paving, patience with sand matters. A common error is under filling the joints after the first pass. Run the compactor in overlapping lines, then sweep a final layer of sand across the surface. The joints should look full, not packed to overflow.
Sweeping and Sealing the Surface
After compaction, the surface looks finished, but the job is not done. For anyone mastering how to install brick paving, sealing is the step that separates a sturdy path from a stained, weed-prone mess. Sweep away all loose sand and debris first; a clean surface lets the sealant bond properly without trapping grit.
When applying the sealer, follow these steps for an even coat:
- Work in small sections to avoid overlap marks.
- Use a roller or sprayer, not a brush, for large areas.
- Apply two thin coats, waiting for the first to dry completely.
Let the final coat cure for at least 24 hours before foot traffic. This patience pays off. I have seen too many projects fail because the sealer was rushed, leaving a cloudy film that dulls the brick’s natural colour.
Finishing Touches and Maintenance
Curing Time and Initial Care
Once the sweep of your new terrace settles, the real work begins. Patience matters on this job. The sealant needs 48 hours to cure, and during that time, your brick paving remains vulnerable. Sudden rain or a misplaced pot plant can leave permanent marks.
For the first week, follow these care steps:
- Keep all traffic off until the sealant cures.
- Remove fallen leaves with a soft broom.
- Inspect joints and top up shifted sand only if needed.
Water causes most problems here! Light irrigation can wash away the fitted sand. I once watched a Johannesburg thunderstorm undo an afternoon of joint filling. Cover the area with a tarp if heavy weather threatens, and check the drainage flow again.
After two weeks, move furniture across, but drag nothing. When you understand how to install brick paving, you learn maintenance is an ongoing process. Yearly sealer reapplication keeps your work intact.


0 Comments